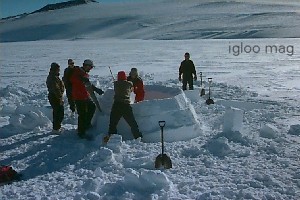
The following tips are provided for constructing an igloo. Two or three people ease the work and speed construction. One snow shovel, a snow saw per person and a pair of heavy duty rubber gloves per person are all that is needed for construction. For comfort, put on a wind breaker or gortex parka and pants to keep the loose snow off your clothes.
Finding the right type of snow for cutting snow blocks is critical. Snow texture and consistency is important. The best snow is usually found on a north facing slope. Snow melted by the sun during the day, and refrozen at night, contains ice and will not bond very well.
The size of the igloo is mentioned for it is easy to initially plan an igloo larger than needed, invoking too much work. Pack out an area where you plan to build the igloo. Draw a circle with the radius equal to the length of a ski pole. For more than two, a slightly larger radius is suggested.
The snow blocks, dimension two feet long with a one foot by one foot cross section, are laid around the circle.
After completing the first row of snow blocks around the base of the igloo, use a snow saw to create a circular ramp that starts flush with the ground and curves around the entire first row of snow blocks. This ramp starts at ground level and finishes one block high adjacent to the starting point. Start the second row by placing the first block on the lowest point of the circular ramp and continue placing snow blocks around the second row.

With the second row, start sloping the top of the blocks with the snow saw so that an imaginary line, from the top of the block, passes through the center of the circle. The next round of blocks are laid, again making sure the slope of the top block points to the center of the circle. When bonding a snow block to its neighbor, it may be necessary to make a small fresh cut for the ends of the blocks tend to ice up quickly preventing a good bond from forming.
Each new block is supported both by the blocks beneath and by its neighbor to one side. Its the support of the block to one side that allows you to lean each row of blocks in a little further.
One member of the group should stay inside to support and trim each block while the other member(s) cut, carry and place the blocks.
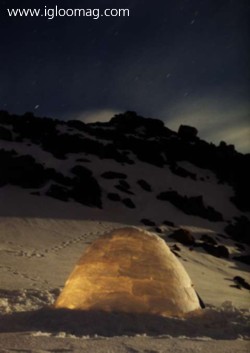
All of this takes about to two hours but is so rewarding when you come to the last few blocks, which are laid close to horizontal overhead. Carve an entrance in the side. Fill the cracks with snow. If the bonding has been good, a very strong structure now exists. It should be strong enough such that a person could stand on the top.
Be certain that there is a small vent in the top when using a candle or stove.


![Romanowitch :: A critical season substitute (glitch.cool) — [concise]](https://igloomag.com/wp/wp-content/uploads/2025/03/romanowitch-a-critical-season-substitute_tape_feat-75x75.jpg)


